- Published on
How to build TikTok with Flutter? Part 2
- Authors
- Name
- Loi Tran
- @PrimeTimeTrann
How to build TikTok with Flutter?
In part two of our TikTok Flutter tutorial series we'll work on creating the UI for the main screens.

Create Inbox Screen
Create a new file to contain the page/screen.
.
├── ...
├── pubspec.yaml
└── lib/
    ├── navigation/
    │   └── DrawerNav.dart
    ├── pages/
    │   └── TikTokPage.dart
    │   └── InboxPage.dart # Create this file
    └── main.dart
Define a InboxPage screen/widget.
// ./lib/pages/InboxPage.dart
import 'package:flutter/material.dart';
class InboxPage extends StatefulWidget {
InboxPage({Key? key}) : super(key: key);
State<InboxPage> createState() => _InboxPageState();
}
class _InboxPageState extends State<InboxPage> {
Widget build(BuildContext context) {
return const Center(
child: Text('InboxPage'),
);
}
}
Import InboxPage into DrawerNav and place it in it's corresponding index of _widgetOptions.
// ./lib/navigation/DrawerNav.dart

// Code Omitted
import 'package:fluttok/pages/InboxPage.dart';

// Code Omitted

class _DrawerNav extends State<DrawerNav> {
  // Code Omitted

  static List<Widget> get _widgetOptions => <Widget>[
    const TikTokPage(color: Colors.yellow),
    const TikTokPage(color: Colors.blue),
    const TikTokPage(color: Colors.green),
          InboxPage(),
    const TikTokPage(color: Colors.pink),
  ];

  // Code Omitted
}
- Line 2: We import the newly created
InboxPagewidget. - Line 13: We place the widget/screen/page as the 3rd index in our
_widgetOptionsso that whenInboxis tapped, this widget is selected.
We should now see a white screen when we tap the Inbox tab in the bottom tab navigator.

Create InboxPage Header/AppBar
Update DrawerNav, adding an appBar parameter with a value of an AppBar widget to the Scaffold we use.
// ./lib/navigation/DrawerNav.dart

// Code Omitted
Scaffold(
  appBar: AppBar(title: const Text("Inbox")),
  body: _widgetOptions.elementAt(_selectedIndex),
  // Code Omitted
);
The title parameter of AppBar determines the header/app bar text.

To display an icon in the top right, add actions as an additional parameter to AppBar. The value of actions is an array because we can have one or more icons/actions
// ./lib/navigation/DrawerNav.dart

// Code Omitted
Scaffold(
  appBar: AppBar(
    title: const Text("Inbox"),
    actions: <Widget>[
      IconButton(icon: Icon(Icons.message), onPressed: () {}),
    ],
  ),
  // Code Omitted
)

InboxPage now has a header/app bar with an action button in the top right.

Note: We have a problem where the same AppBar is shown on all screens.
Create Horizontal Scroll of Friends with recent posts
Add faker library useful for generating smart dummy data.
flutter pub add faker
Import faker into InboxPage and create a faker instance used to generate names.
// ./lib/pages/InboxPage.dart

import 'package:faker/faker.dart';

final faker = Faker();
Refactor InboxPage to add a horizontally scrolling list of avatars using a ListView.
// ./lib/pages/InboxPage.dart
class _InboxPageState extends State<InboxPage> {
Widget build(BuildContext context) {
return Column(
children: [
SizedBox(
height: 100,
child: ListView.builder(
itemCount: 10,
scrollDirection: Axis.horizontal,
itemBuilder: (ctx, i) {
return Padding(
padding: const EdgeInsets.all(5),
child: Column(
children: [
CircleAvatar(
radius: 30,
backgroundImage:
NetworkImage('https://i.pravatar.cc/150?img=$i'),
),
Text(
faker.person.firstName(),
style:
const TextStyle(color: Colors.black87, fontSize: 10),
),
],
),
);
},
),
),
],
);
}
}
- Line 6: We add everything inside of a Column
- Line 12: We define the ListView
scrollDirectionas horizontal. - Line 13: We pass the
itemBuilderparameter a function which returns a widget for each instance within our scroll. In other words this function is used to create each item in the horizontally scrolling list of friends with recent stories.

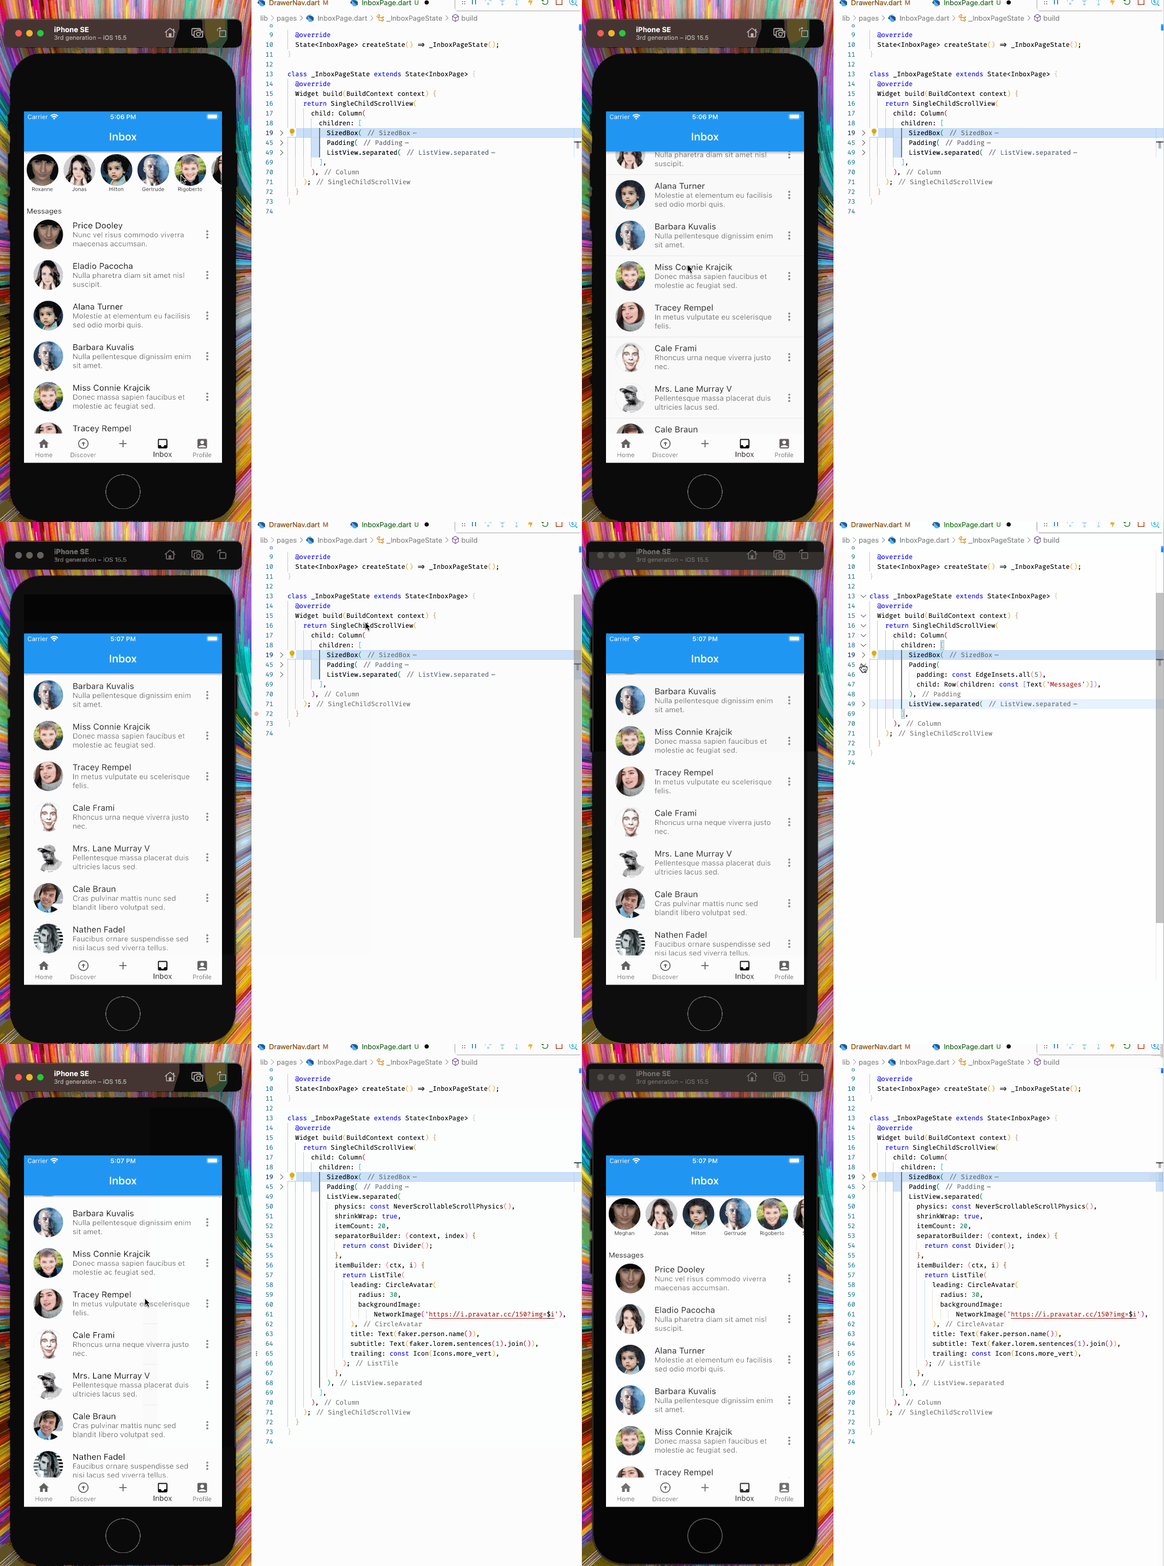
We should be able to see a horizontally scrollable list of avatars now.
Create Vertical Scroll of Message History
Use another ListView to create the vertically scrolling list of messages.
class _InboxPageState extends State<InboxPage> {
Widget build(BuildContext context) {
return Column(
children: [
SizedBox(
// Code Omitted
),
Padding(
padding: const EdgeInsets.all(5),
child: Row(children: const [Text('Messages')]),
),
ListView.separated(
physics: const NeverScrollableScrollPhysics(),
shrinkWrap: true,
itemCount: 10,
separatorBuilder: (context, index) {
return const Divider();
},
itemBuilder: (ctx, i) {
return ListTile(
leading: CircleAvatar(
radius: 30,
backgroundImage:
NetworkImage('https://i.pravatar.cc/150?img=$i'),
),
title: Text(faker.person.name()),
subtitle: Text(faker.lorem.sentences(1).join()),
trailing: const Icon(Icons.more_vert),
);
},
),
],
);
}
}
- We add the code to the end of our
Colwidgetschildrenparameter, anarray. - Line 9-12: We add a
Rowafter the firstListViewfor a titleMessages. - Line 13-32: We add a second
ListView. This time instead of creating the UI ourselves using widgets, we useListTileon line 21.

- Note: We see an overflow bottom warning.
- We cannot scroll vertically.
Fix warning and implement vertical scroll
Wrap Column with a SingleChildScrollView to remove the warning.
return SingleChildScrollView(
  child: Column(
    children: [
      SizedBox(
        // Code Omitted
      ),
      Padding(
        // Code Omitted
      ),
      ListView.separated(
        // Code Omitted
      ),
    ],
  ),
);
- Line 2: Column should be passed to the
childparameter ofSingleChildScrollView.
SingleChildScrollView allowed us to complete InboxPage, excellent.
